Monday, January 27, 2014

Michelle Ward SG blog hop

I'm so glad you stopped by!  I am excited to show you Michelle Ward's new Segments Small Stencil.  I like the large negative spaces in this design.


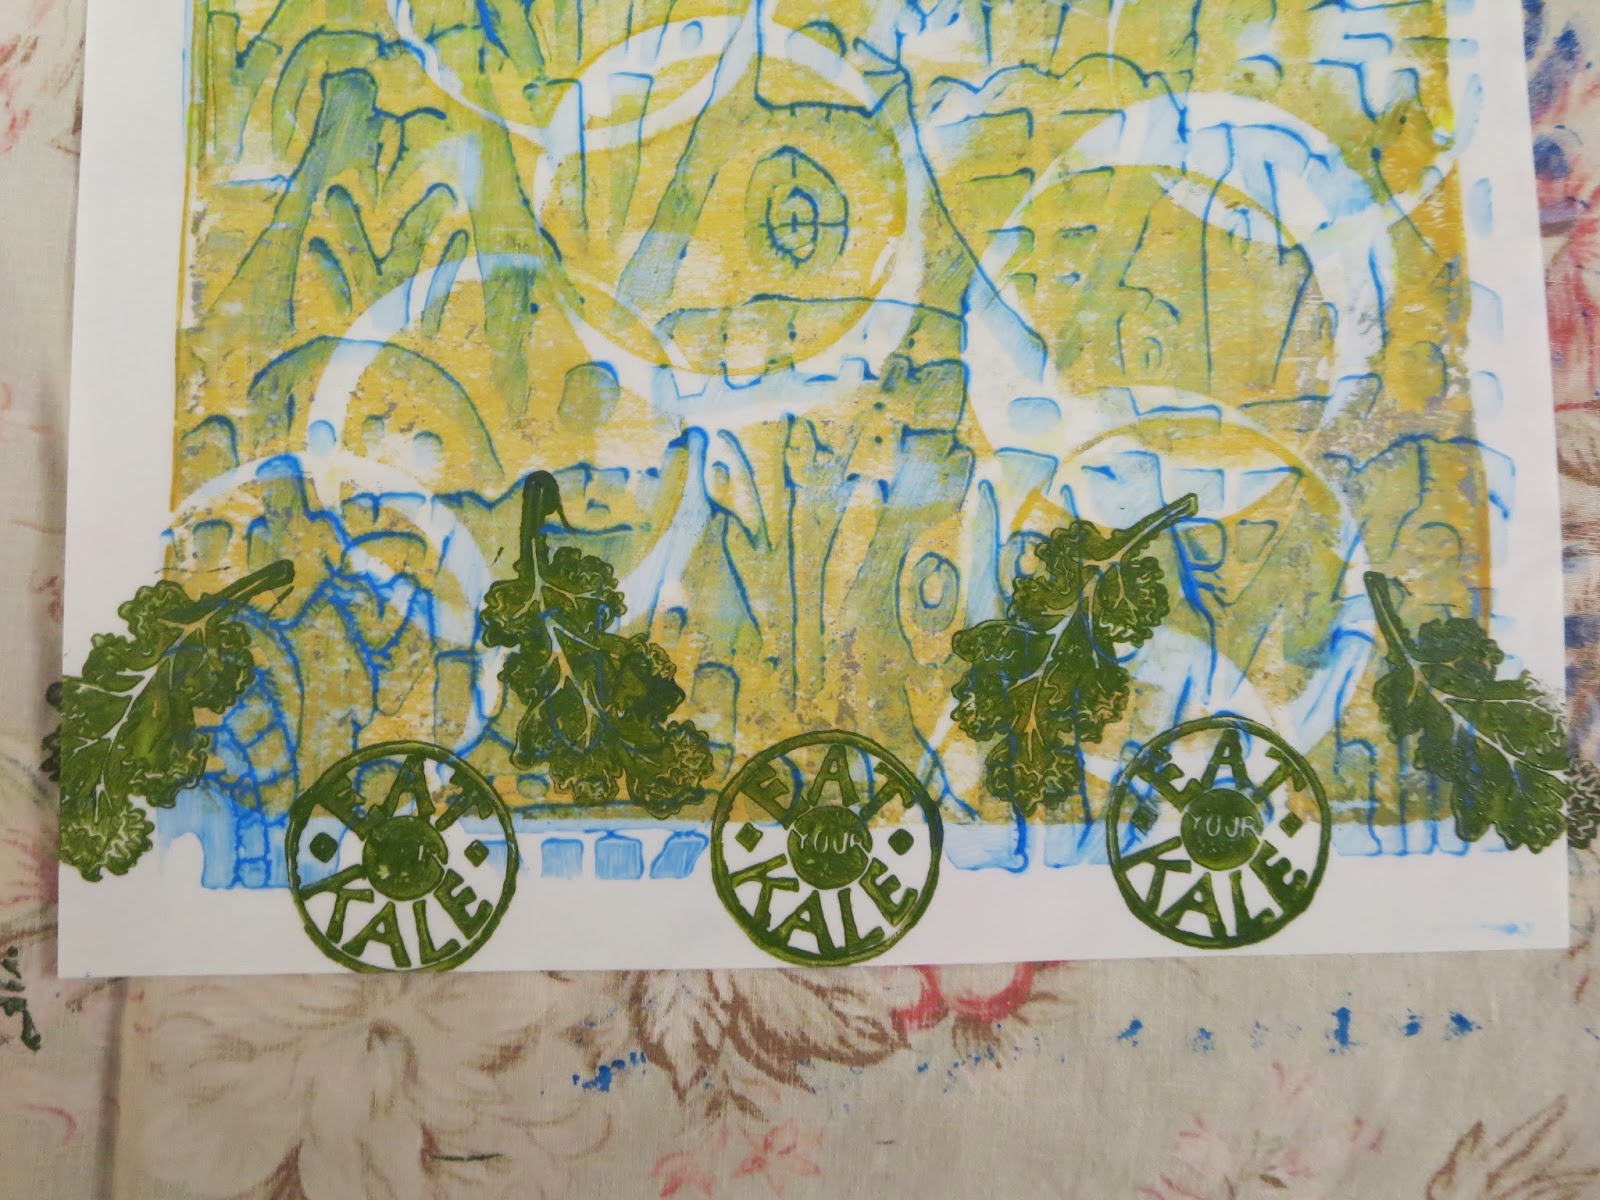
I had two ideas I wanted to explore with this stencil.  The first is a piece of watercolor paper that had been previously gelatin mono printed and stamped with my hand-cut acrylic stamps.  Some of the shapes in the stamp reminded me of this stencil.
Here is the paper before the addition of the stencil

I put the stencil over a portion of the surface.
My intent is to lightly spray acrylic paint (Liquitex) in a series of layers.


I like the way this looks.  The lightly sprayed paint allows the base layers to be seen through the stencil openings.

For the next project I used a small box that was part of a holiday gift.
Using washi tape on the sides and over the surface I was able to alter the appearance.


Once the top of the lid was fully covered, I placed the stencil on the surface and
pounced a layer of opaque white paint into it.


I love the ghosted pattern of the tape under the white paint and the linear openings from the stencil!

I drew around the edges of the paint with a black pen.


I had a previously cut, fused piece of fabric from Jamie Fingal's new line from Hoffman.
Since fabric fuses quite nicely to paper (and boxes!) I decided it was a fun addition to this
box.  Since it was a coffee cup it needed some "steam".


I wrote a few thoughts about my love of coffee into the "steam".

I hope you like my little box project.   A little tape, a bit of paint with this fun stencil, 
a bit of leftover fabric, and you have a great little gift box that is truly unique.

Thanks for stopping by!


Please be sure to stop by the other blogs on the hop and remember:  every comment you leave increases your eligibility to win a selection of Michelle's new stencils.

Friday, January 17, 2014

At The Wheeling Artisan Center

I was honored to be part of a four-person show with Luke Haynes, Joe Cunningham, and Erin Wilson
at the Wheeling Artisan Center.  I sure wish I had more photos!  I was unable to attend the opening.
Here are my four quilts. Nice to see some people checking them out!

One of Joe's quilts in the foreground, and another in the distance on the right.

Wednesday, January 8, 2014

Artist Play Date in SoCal with Jamie Fingal

Greetings!  Last weekend I flew to Orange County CA to attend a family wedding.  I extended my stay in order to get some work done with my friend and partner in crime, Jamie Fingal.  We do a great deal together:  teach, curate, and more, but we rarely afford ourselves the opportunity to simply play.  In fact, I'm not sure we have ever taken an afternoon and created something that was not intended for a workshop or some other project.  So, it felt really luxurious and fun to take the afternoon before I headed to the airport and simply make art.
The Sketchbook Challenge theme this month is "Collage" which is right up my alley.  I do a great deal of collage work in both paper and cloth (and, as in this case, the combination of both).  If you are stopping by after visiting the SBC blog you know I have a post up over there with one of my collaged pages.  Here is the second of three that were partially created while at Jamie's studio.


Here is the ephemera from my trip that will be used for the base layers of my collages.

In addition, I used some newsprint from the day's local paper and some scrap paper from Jamie's studio.


I scratched over the surface with some opaque white paint to "mess" it up a bit.

Using the Fingal Flower & Leaf stencil I pushed some bronze & black paint onto the surface.

In addition I used an old letter stencil from an office supply store to add some texture 
to the collage surface.

Here are the three collages I was working with.


Here is an aerial view of our work table with Jamie working at it.

After the surface dried I worked back into it with a Pentel Gel Roller pen.
I moved across the surface and selected some shapes that I wanted to accentuate.


I wrote a few thoughts over the collage surface...

When I returned home I decided to die-cut some fused silk organza that I had stashed in my 
fabric shelf.  Prior to cutting the dress shape I pre-fused the organza with Mistyfuse.


I accentuated the fused shape within the dress with the Pentel Fabric pen.


After fusing to the collage surface I outlined the dress shape so it became more visible in the collage.

I cut the collage into an 8x8 inch square in order for it to fit into my sketchbook.

This page will face the page I created for my SBC post.  It provides a lovely memory of the wedding weekend in California.  Thanks for stopping by!  


Friday, January 3, 2014

Eat Your Kale! A blog hop featuring Rubbermoon Stamps and Stencil Girl stencils

Happy New Year!  I jumped at the opportunity to use Rubbermoon's Eat Your Kale and Kale Leaf stamps on a project because we Jenisons are big kale-eaters.  As a holiday gift I decided, among other things, to make some fun customized tea towels with a kale theme.

For this StencilGirl blog hop, we’re showcasing stencils by Kae Pea (Kristen Powers) along with Rubbermoon Stamps. Not only does Kristen design stencils for StencilGirl, but she is also the owner of Rubbermoon!
Best of all, both Kristen Powers and Mary Beth Shaw are hopping along with us!!

I gave tea towels to family friends and to each of my daughters.  I have a  thermofax screen with bundled asparagus so I made a set for each recipient.

"Eat Your Kale", by Gretchen Ehrsam

"Kale", by Gretchen Ehrsam


Using acrylic paint I pounced the paint onto the stamp surface.


The towel was placed over a padded surface.

Despite the fairly course weave of the tea towel I was able to get a nice mark with both stamps!

Next, I used the stamps and my Tribal Leaves Stencil on both paper and a length of cotton batiste fabric.

Tribal Leaves Stencil by Kae Pea (Kristen Powers)

This first piece of paper is Yupo, a synthetic paper that feels a bit like vellum.
This is a sample from a recent mono printing demo.  I love to use these as a base layer for additional marks.


Since the surface of the Yupo paper is so smooth I took a foam pouncer and "pulled" my transparent paint across the stencil surface to create a distinct edge of paint.  I like how it looks!

I stamped the Kale and Eat Your Kale stamps along the base.

I used both the stencil and my two Rubbermoon stamp on yet another sample that had been printed with Mary Beth Shaw's "Rafters" stencil:


I like the way the two Rubbermoon stamps interact with the first marks on the paper.


To add a bit of depth I used a Sakura gel pen to the printed edges

And, I add a portion of the Tribal Leaves stencil to the paper.

I love how this paper looks!
I think the combination of the Rubbermoon stamps and the Tribal Leaves stencil really work together.
What do you think?


The tribal stencil works extremely well on cloth.
Here, I am using a cotton batiste cloth that I had previously printed with thickened dye.
I was underwhelmed with this cloth and, to be honest, I had been using it as a studio rag.
Confession:  sometimes those studio rags and drop cloths end up being the best thing that happens in my studio.  I just roll with it.  LOL

Using some Setacolor transparent paint (medium blue) I pounced the paint through the stencil onto the surface of the cloth.  I deliberately varied the intensity of the paint coverage.

Result:   the cloth has a new life!  I love it!  I may finish the edges and use this as a scarf.
It has definitely seen a marked improvement, and the Setacolor paint has not altered the "feel" of the cloth.

I'm looking forward to working with all these new tools in other projects.  I see a lot of possibilities!
I hope 2014 is off to a good beginning for each of you.  Drop by and see me often!


We will have a giveaway on StencilGirl Talk blog consisting of SG product. All comments on the hop are eligible for the giveaway. The more blogs you comment on, the better chance to win. The gIveaway will close on Friday, January 10th at 11:59PM Central Time.


Here are the links to all the participating blogs.  Please be sure to head over to Maria McGuire's blog next.  Remember to leave a comment in order to be eligible for the drawing!  Thanks for stopping by!