I've been away from a physical planner ever since I converted to a Palm Pilot (gasp!) in the mid-90's. Most of my "life" schedule has rolled over to my iPhone calendar, but in the past year I have begun to realize that my "quilt life" isn't very organized. I have a white board up in my temporary studio space and eventually I will have numerous chalk-painted walls in my remodeled studio to hopefully keep me on track.
But I keep hearing all the great things about this new 2016 Quilter's Planner by Stephanie Palmer of Late Night Quilter! I just ordered mine from the Fat Quarter Shop. I am copying their YouTube video so you can take a peek and see what you think. I'm quite anxious to get my new planner and I hope to put it to use right away.
Here are a few of the things this planner contains (as listed by the Fat Quarter Shop blog):
- Monthly calendars
- Weekly calendars
- Project planning pages
- Graph paper
- 8 full quilt patterns from amazing designers
- 52 original quilt block designs
- Beautiful artwork pullouts by Kelsey Boes of Lovely and Enough
- Reference section for quilting calculations and common construction techniques
So here is my question to you: How do you keep your quilt life organized? Do you have more than one strategy? I'm sincerely interested. I know that I need to change my method of tracking my work flow and I am looking at any and all ideas.
I feel as though my renovated studio will be part of that plan as it will have a better work-flow. Does the organization follow? We shall see! I am hoping that the new planner, my chalk walls, and a white-board will work for me. If there is something else that you find helpful please drop me a comment.
Wednesday, December 30, 2015
Monday, December 7, 2015
Start Out Your Year in Napa: the Craft Napa blog hop stop!
I hope you are as excited about the upcoming Craft Napa retreat as I am! I will be teaching all three days, but if I wasn't I would be taking workshops alongside you. I'm delighted to be teaching with so many wonderful and inspiring instructors. What a perfect way to jumpstart the creativity for 2016, right?
I've decided to offer these three workshops:
"Intro to Improvisational Piecing: Quilt Design with a Modern Spirit"
"Sweet Little Somethings: Mixed Media Paper & Fabric Collage"
and "Geltastic & Printalicious"
I thought I would show you a bit about all three of them, so come on!
Intro To Improv was inspired by my desire to figure out what people might do with those stacks of die-cut fabric, usually called "Layer Cakes". I wondered if I could come up with something interesting.

This was the first quilt I constructed, called "Fifty Shades of Groovy".
This quilt was juried into the inaugural QuiltCon show in 2013.
I had so much fun making this quilt that I proceeded to make many more using this basic technique. Each quilt has its own "personality", and I learned some new tricks along the way which I will share with you in this workshop. It is a really fun process and is perfect if you are a beginning quilt maker or if you have some serious skills. As long as you can use a rotary cutter/ruler and know the basic stuff about using a sewing machine, you are good to go!

Here is the most-recent quilt using the same general technique.
This quilt is called "Thoroughly Mondrian Millie" and is queen-sized.
Truly, the possibilities are endless so come explore this fun improv class with me. Most students get the basic central "unit" constructed in the 6-hour workshop.
And guess what? We will have our own beautiful stable of Bernina sewing machines to use all day long! What? How great is that?!
Geltastic & Printalicious is a fun and fabulous way to do some mark-making/printing in a few different ways. First, we will craft our own unique stamps using fun foam. We will use the stamps in two ways: gelatin mono printing and stamping! We might even make a few rubbings using these same stamps. Versatile, aren't they?!


I love using this set of techniques to make all sorts of tags, cards, and more.

Gelatin printing is great when used with stencils, too!


Oh, I use all sorts of crazy tools to make marks. Come play with me and I'll show you! I'm writing about this one 2nd because I think these could be used in the third and final workshop.....
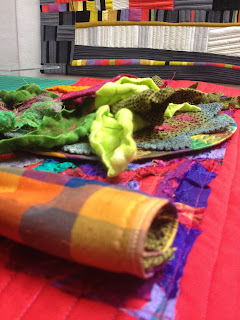
Sweet Little Somethings is a very lovely, meditative workshop that I think you will enjoy. I am one of those people that needs to be doing something with my hands when I have down-time. I love to have a little project to stitch on when I am in an airplane, the rare times I am a passenger in a car, etc.. I love to stitch! I combine that with my habit of collecting little bits of ephemera along the path of my travels. Combining the textures of cloth, paper, and stitch is so much fun and I will show you several approaches I use to do this.
We will create some basic substrates and use part of the day to simply stitch (using Bernina sewing machines and hand-embroidery, so bring both types of thread!). What could be better? Plus, you will have some groovy tidbits to continue working on in your hotel rooms or while you are hanging out with all your new friends during the evenings of the event.
Here are a few things I have made in the spirit of this workshop:


and machine stitching.....


And wait! There's more!
CRAFT NAPA is being sponsored by BERNINA and Meissner Sewing and Vacuum Centers. https://www.meissnersewing.com


Please leave a comment on my blog (and all the others!) to be eligible for the drawing. Pokey will draw the winner from all blog comments after midnight of December 10th.
Please be sure to visit all the other participants! Here's the blog hop list:
Nov 30 – Jane LaFazio – http://janeville.blogspot.com/
Dec 1 – Lynn Krawczyk – http://smudgeddesignstudio.com/blog/
Dec 2 – Judy Coates Perez - http://www.judycoatesperez.com/
Dec 3 – Jenny K. Lyon - http://quiltskipper.com/blog/
Dec 4 – Jamie Fingal - http://JamieFingalDesigns.blogspot.com/
Dec 5 – Melanie Testa – http://melanietesta.com/blog/
Dec 6 – Elizabeth St. Hilaire - http://www.paperpaintings.com/
Dec 7 – YOU ARE HERE! - http://leslietuckerjenison.blogspot.com/
Dec 8 – Carrie Bloomston - http://www.carriebloomston.com/blog/
Dec 9 – Cheryl Sleboda – http://blog.muppin.com
Dec 10 – Pokey Bolton - http://pokeysponderings.com/
Thursday, October 29, 2015
Studio Story: Remodeling, Part 5
Since I've been traveling almost constantly since.....wait.....mid-July? I haven't been great about blogging. Time for an update about the studio remodel!
The ongoing discovery of poor workmanship on the original build continued with the windows. The collection of windows on the house, both upstairs and down, were installed improperly which was allowing water to run inside the walls. Do I need to elaborate on the consequences of this over a 30-year span? Probably not!


The ongoing discovery of poor workmanship on the original build continued with the windows. The collection of windows on the house, both upstairs and down, were installed improperly which was allowing water to run inside the walls. Do I need to elaborate on the consequences of this over a 30-year span? Probably not!

So, the stucco was cut out from around the windows (and other places where wood rot was discovered), the structure repaired, waterproofed, and new windows were installed.

I can't imagine what our neighbors must think we are doing!

The good news: I have an amazing team on the job and despite all the unexpected set-backs they remain on-schedule with the remodel. Here are my "morgue drawers", as I call them. They are heavy-duty! Each long drawer can hold up to 500 pounds. I anticipate storing extra sewing machines and other heavy items in these.


A new set of cabinets and a small countertop, and to the left of the ladder is another closet.

The concrete floor in the wet-room has been ground down and sealed. Now it is covered with protective paper.

The hallway doesn't look like much yet. We added an area of recessed shelving to house my books and miscellaneous keepsakes
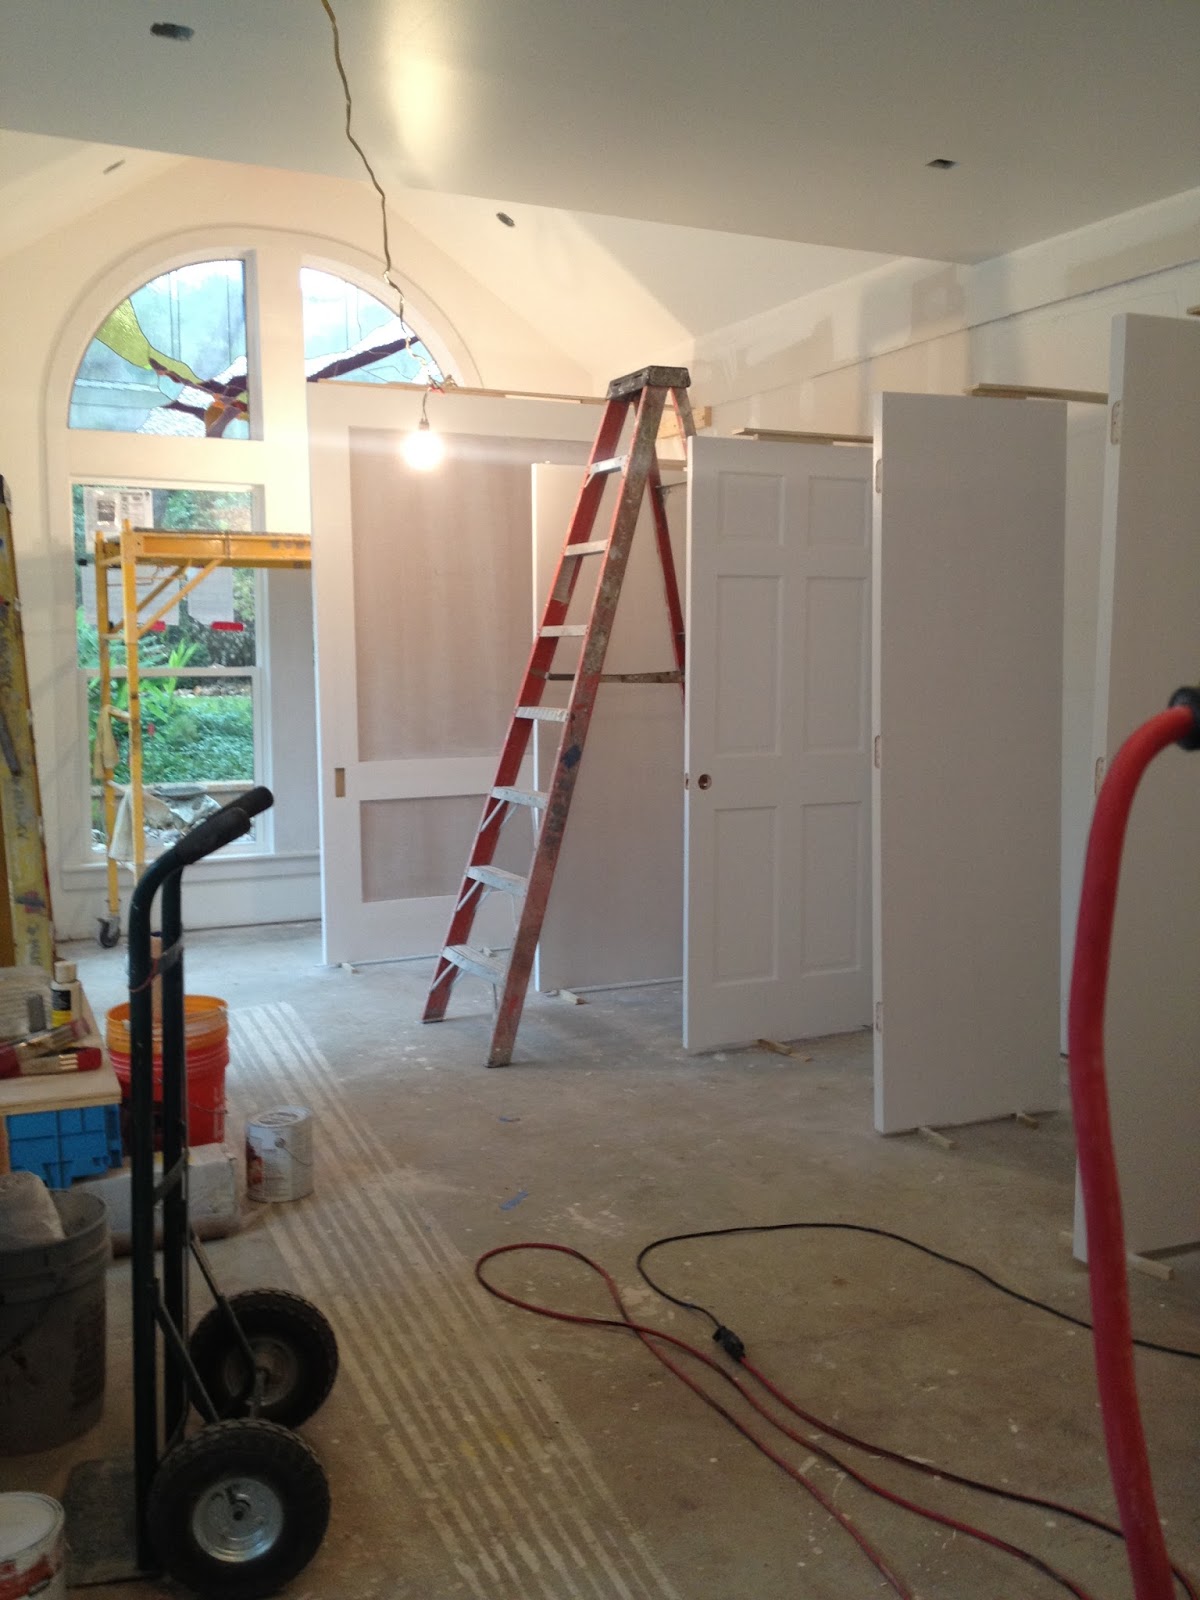
In the main studio design area it appears I am hosting a door convention! See that big guy close to the window? That is my sliding "barn door" which will mostly cover up my quilt storage area but can slide to close the wet room if needed.

We have gone from this......
to this.....


Best thing yet? My orange ceiling beam!
If you know how much I adore orange you know how I am happy about this!
My cabinets in the wet room will also sport this color on the outside.
Saturday, September 19, 2015
Affinity For Improv and Love of the Line
I am exploring some new territory in my recent work. This is one of those intervals that may appear to be coming out of nowhere, but in reality, this has been on my "list" for some time.
It started last spring when I went to study at the Crow Timberframe Barn with Carol Soderlund. I got to do two things at once that I had been dreaming of and it was a great experience. It started me on a path I have been thinking about since the late 80s: studying with Nancy Crow.
The reaction I get is usually something like this: "I don't understand. Why are you doing this? This doesn't seem like a place your work is going...." and on. Yes, I get that people don't see it as a natural progression of the work I was doing two years ago. I'm quite fine with that. This exercise has multiple goals:
To study with an artist whose work I admire a great deal.
I want her to challenge my point of view.
I expect it to be difficult.
I expect to struggle, and probably to fail multiple times.
My goal is not to make work that resembles Nancy's, rather, it is to see what is possible by adding the information she gives me to my own aesthetic.
I can't wait to see what shakes out of all this!
One revelation: free-cutting fabric selvedge to selvedge with a rotary cutter to expose the gestural line in cloth. This really excites me! I feel so close to drawing when I do this: I'm pulling the rotary tool toward me versus the traditional method ofpushing it away. No ruler! It allows more control and is deeply satisfying.
I created this quilt which is my curator's piece for the soon-to-be "Affinity" exhibition (for Dinner At Eight Artists in Houston at the International Quilt Festival) using this free-form method of construction and I'm pretty happy with the results. All the quilts in the exhibition will be 40 inches square.

With the exception of some of the black and gray, the rest of this fabric was hand-dyed by me.

I enjoyed the process of free-motion quilting this piece on my Bernina 750QE.


I hope many of you will be at the International Quilt Market & Festival this fall in Houston, TX. Please look me up! I'll be there!
Saturday, September 12, 2015
Late August/September happenings.
Despite the crazy travel schedule I have had this year I really have been able to produce some work. Here are a few images of life as I have seen it through garden discoveries, beautiful vistas in places I love, and quilts.


Beautiful cicada (I think) wing found in the garden at home.

A wonderful retreat with my SA Mod Quilt Guild friends in Kerrville TX.
Making my curator's piece for the upcoming installation of "What's For Dinner?"
which will be shown at the International Quilt Festival in Houston.
Here is the beautiful cross-stitch embroidery of my Bernina 750QE. This is the edge of my
dinner "plate".

A view of my place-setting for "What's For Dinner?".

Quilting my piece, "Bright Light On the Edge of the Horizon" for Oasis,
a regional SAQA exhibition to debut in Palm Springs, CA.

Putting the facing on the quilt....

A trip to Kansas to help a friend who is having surgery. We drove out into the Flint Hills the day before. I have a deep connection to this part of the country.

A field of ripe sunflowers. Gorgeous day in Kansas!

Friday, September 4, 2015
Come To Craft Napa!

|

|


Wednesday, August 26, 2015
Studio Story: Part Four
I meant to post a copy of my blueprint so you could see the layout of the studio in the last post but I forgot to do it. This will be a very short post!


The area at the bottom of the image is my newly-poured concrete slab directly out from the new door.
Friday, August 21, 2015
Studio Story Part 3: Overcoming the Unexpected
Even when you anticipate that there will be things that you don't know about......let's just say that we have had more of this than we anticipated! Ha!
I am trying to remain philosophical. Tis better to know the reality and deal with it, right?!


I am trying to remain philosophical. Tis better to know the reality and deal with it, right?!

Yes, that is what it looks like: an enormous (!) old honeycomb was removed from behind the old shower plumbing.

See that line running UNDER the foundation?
That is irrigation pipe, and it was not capped off. The studio is part of a major addition
that was added to the house by the original owners. Who did it?!

The corner just left of the left window in this image was in such bad repair the entire thing was reconstructed and waterproofed.
These two people, my architect and the project foreman, are working together to get it done properly.
Many problems have been solved.


Here is the newly-widened doorway leading into the new wet-area.
This will have a pocket door.

A new shelving area was added to the old hallway...

And this was taken standing in a newly-created doorway looking from the hall into the wet-area.
The plywood on the far side of the room will eventually be the new door leading out to the side yard
and a newly-poured concrete slab where I can do stinky messy stuff.

Looking from the main room down the hallway...
Some other fun stuff....

I'm looking at materials for the space. I chose this birch flooring/stain (on the right)
for the main design area of the studio (the wet-area will have simple concrete floors with rubber mats). The hexi tile will be installed on the floor of the old shower area in the wet room. The gray composite material in front of the hexi sample is laboratory countertop material, which is what I intend to use on the counter of my wet studio (just one place, everything else will be stainless surface).

Here we are looking at a variety of subway type tiles for the shower walls. I want a combo of rectangular pieces (naturally!) so we are discussing how to do this.

Maybe some combo of these?

I was able to sneak out and carve our initials into my newly-poured slab.
I've always wanted to do this! Yay!
The status is that we are still chasing an occult water leak which seems to be coming from failed caulking around the old window frames. This has caused a lot of damage and we are dealing with that. The sheetrock work really can't begin until this has been solved but the crew is finding many things that can be done while the search is on for the leaks. The electrical upgrades have been put in place. I added another circuit to handle the potential load from multiple heat sources. The design wall board has arrived. I am using the same material as Nancy Crow has in her Timberframe barn in Ohio, a product from Canada which is not frequently used here in the States but is AWESOME for pinning! We have figured out how to put it up and finish around it.
Subscribe to:
Posts (Atom)